I don't know. Maybe it's me but I can't imagine a craft room without glitter.
My family can't either. I seem to bedazzle everything they own without meaning to. It just sort of lands...everywhere!
As I write this, I am looking down at my kitchen floor and seeing it sparkling up at me for reasons besides cleanliness.
You have to admit, glitter is glam and often the reason people notice a craft you have on display. Especially if the fluorescent lights are reflecting the glitter just right.
Today's short blog is about something I found to be very helpful in shaping glitter and keeping the glitter under your creative control. What is my double sided wonder?
The double sided wonder I am talking about in this blog is Double Sided Tape.
It comes on a roll and you can buy it in craft stores like Michaels and A.C. Moore. You can also buy it online. If you are making a craft that will be exposed to constant changing temps, may I suggest be very choosy with the brand of Double Sided Tape you choose for your projects. Of all the Double Sided Tape I have used, I found the best sticking Double Sided Tape to be by Frost King. Frost King is a Thermwell Product. Also used for weather stripping. I think it will impress you with how long and well it sticks. If you like making cards and paper crafts Frost King Double Sided Tape also holds some brands of ribbon to paper very well.
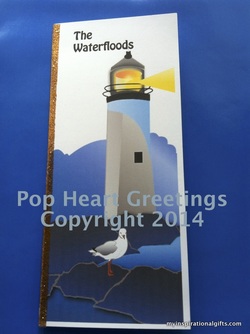
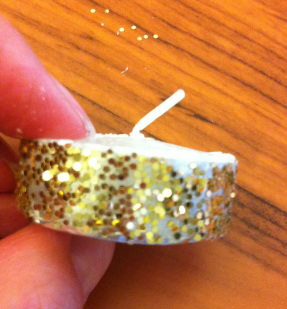
I use Double Sided Tape for bedazzling greeting cards, sides of tea light candles, creating tiny flowers to embellish cards and crafts, scrape booking, and so many other crafts.
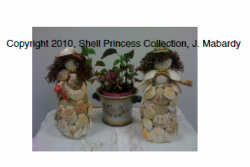
Sample of tiny flowers made with Double Sided Tape and ribbon to embellish a Shell Angel Princess doll.
Below are the steps I take to keep creative control of glitter I am adding to my project.
1) Choose a smooth clean surface to work on. What I mean is a surface that if while applying your tape to glitter, the tape will not stick to the surface. A varnished surface or counter top works nicely.
2) Spread your glitter on the smooth surface. If you are mixing two glitters may I suggest one glitter be finer than the glitter you are mixing it with. It adds dimension and a nice effect. You do not need to premix the glitter. You could set each of the glitters in a separate pile on the surface. It is best to not put a ton of glitter out but rather just enough to keep control on the table top. You can always add more
3) Cut the appropriate size length of Double Sided Tape for your project off the roll
4) Peel back only one side of the Double Sided Tape. Depending on your project, peel off the entire front side of the Double Sided Tape all at once or a portion at a time.
5) Dunk the sticky part of the Double Sided Tape in the desired glitter(s) and keep rolling back more of the front of the tape and dunking in the glitter until one side is completed.
6) Peel back the back side of the now glittered tape a a little at a time as you stick the tape where you want to on your project.
If making a glittered boarder for a card an easy and less messy way is to cut the Double Sided Tape to the desired length for the card boarder. Peel back one side of the Double Sided Tape and stick it on the card where you want your boarder to be. Spread your desired glitter on the table top or smooth surface near the card. Peel back the other side of the Double Sided Tape on your card to expose the stickiness of the Double Sided Tape. Dunk the sticky boarder on your card, in the pile of glitter. I found it is best to dunk one section of the boarder in the glitter at a time. Smooth/even out the glitter on the tape as it goes on the card. Continue process of dunking it in the glitter and smoothing until you have the desired look you want for the card boarder.
These are just a few ideas of the great uses of Double Sided Tape on cards and crafts that make beautiful glitter embellished gifts.
I hope you found this informative and helpful for your crafting needs.
Until next time,
Judy
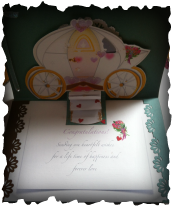
Double Sided Tape works wonders for pop up greeting cards! Sample wedding Pop Heart Greeting Card inside by J. Mabardy. ©2013, Pop Heart Greetings, All Rights Reserved.

 RSS Feed